This post was pre-scheduled to publish while we are off on our self-drive safari
When we originally bought our plane tickets to Africa, one of the advantages to the set of flights we chose was that it gave us a 12 hour layover in Cairo. From doing some research, it sounded like this would give us enough time to see the pyramids, which was a pretty cool bonus feature.
On Arrival
The plane got in at about 11 AM Cairo time. It was fun to fly in and see the pyramids down below you. Our first thought, while unoriginal, was “there is so much sand!”
We went past the EgyptAir transit passenger services booth and found the tours office. It is called Karnak tours, but is is actually part of the services offered by EgyptAir. We got set up with the tour and with their standard offer for transiting passengers: a complementary room at the airport hotel and meals! The tour was going to cost us $45 per person, but since there were a significant number of other people from the flight who wanted to do the same thing, it was only $35 a person.
One drawback is that they take your passport and boarding pass for the duration of the transit. This would have worried us but we had read that it was to be expected. Another drawback to going through Karnak is that doing the paperwork took a long time. They had us sit in the waiting lobby while they booked our rooms and got us all transit visas. It was a little tough to fight off jet lag and stay awake through all this and it would have effects later.
The Tour
We drove the tour bus out of the airport and into the craziness that is the Cairo traffic. Lane markers seemed to be little more than suggestions. Passing happens in crazy zigzags with much honking. It seemed as if intersections involved nosing through and fighting with other cars – biggest car wins of course. (We were lucky we were on the big tour bus!) Despite the craziness of the roads, pedestrians choose to walk in and across the street at all times! We were sure we were going to see someone killed- luckily we didn’t see a pedestrian get hit, but we did see evidence of a large multi-car crash.
We drove over the Nile River into Giza, briefly pausing by the side of the highway to pick up what we first thought was a hitchhiker but turned out to be our guide. He explained that the driver had been in a hurry because the pyramids were closing extra early today because of Ramadan.
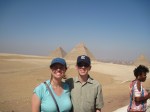
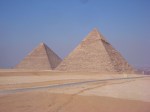
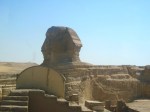
Once we got into the pyramids area, we had time for one photo op in front of the biggest of the three, then we got back into the bus and headed straight to the panoramic overlook where you could also see all three plus other structures. Others in the tour group paid to have their pictures taken on camels. We then got back in the bus because the park was closing. We briefly paused by the Sphinx but didn’t have time to get out of the bus. The rush was truly unfortunate as we would have liked to spend more time in awe of the amazing sites. We wished they had sped up the process at the beginning.
We did have time to be taken to a “perfume museum,” where the owner gave us a free hibiscus drink and then sampled a bunch of different scents for us. Not surprisingly, we were offered the opportunity to purchase some of these scents. The next stop was a “papyrus museum,” where we had a quick presentation on how papyrus is made and then had the opportunity to buy some papyrus artwork from the gallery. We declined both. It took a while, but we finally got out of there and headed back to the airport.
Leaving Cairo
We were dropped off at the Le Meridian airport hotel, which is conveniently connected to the airport by a sky bridge. We had time to shower (yes!) and then to head down to the complementary dinner, which turned out to be a comped meal at the buffet, which had mostly Mediterranean food and was quite tasty.
Upon returning the the airport, we were able to get our passports and boarding passes back without issue (phew).
Our plane for Johannesburg boarded at about 11 PM. So, it was kind of a whirlwind day fighting jetlag, but we think it was worth it to see the pyramids!
Tip for future travelers: if you use the EgyptAir transit option, you don’t need to fill out a departures document. They only need that if they have to stamp you out of the country, and with a transit visa you are never actually considered stamped it.
Another tip: Make sure to heed the warnings to get to the airport 2 hours ahead of the flight. You have to go through an initial layer of security, immigration, and then another layer of security to get into the gate seating itself.

-
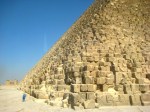
- Notice the size of the man!
-
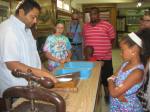
- Learning how to make papyrus
-

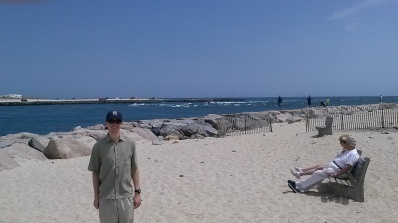
- Eric standing over the Nile